Okay, this has to be the worst "car inspired" song ever.
Hassel-horrible ...
Wednesday, July 12, 2006
Monday, July 10, 2006
Lamborghini: It Could Pants G8RMNI
Saw this car as i was driving through Georgetown in DC the other day. I'm pretty sure it would blow the doors off of any MINI ...


Sunday, July 09, 2006
Zaino Party: How-to
Yesterday I Zaino'd G8RMNI. It takes forever, but the results are well worth it.
There are several steps to follow in order to complete the Zaino process.
1. Wash the car with Dawn liquid dish detergent. The boys at Zaino recommend using Dawn due to it's high alkaline content. The akaline is responsible for stripping any wax, grease and residue from the finish of the car.
2. Claybar your ride. A claybar is able to remove contaminates from the surface of the paint -- i.e. tree sap, tar, water spots, bug guts and any other thing that may be on your paint. Zaino recommends pouring one capful of Zaino carwash detergent for every 24 ounces of water. I poured the ingredients into a spray bottle and shook it up for 30 seconds. After making the soapy concoction I began to spray dow a 2'x3' area and then rub the claybar back and forth over the area. Once I claybar'd the area, I sprayed the soap solution on it again, and then wiped the suds down with a dry cotton towel. No water spots appear ... at all!
You can claybar anything and everything on the car, just make sure to use plenty of lubricating soap solution. I claybar'd the windows to remove water stains. Works like a charm!
3. Wash your ride with Zaino carwash detergent. This removes all of the clay residue and the soapy solution that you had previously wiped off with the cotton towel.
4. Zaino your ride. I used the ZFX wax system made by Zaino. In order to make a fresh batch of the the ZFX soution add 10 drops of activator (blue stuff in the tiny vial) to a two ounce bottle supplied with the kit. Next, top off the bottle with the Z2 car polish. Put the cap on the bottle and shake it for two minutes.
Wipe the car down either all at once or section by section using a cotton towel or one of the cotton applicator pads Zaino includes in the kit.
Zaino recommends only using a dime-size of wax at a time, but I thought it was easier to use a quarter-size at a time. Make sure to wipe back and forth, not in a circular motion, Daniel-san.
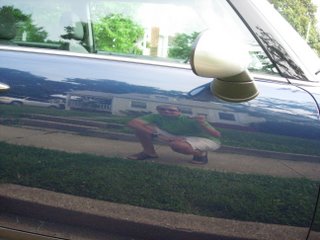
5. Get your buff on. Wait 30-minutes, then wipe down the whole thing with a cotton towel and buff the hell out of it. Your car's paint will turn into a mirror.
You can keep waxing and buffing as much as you want. I only had time to do one coat of wax, but the results were amazing.
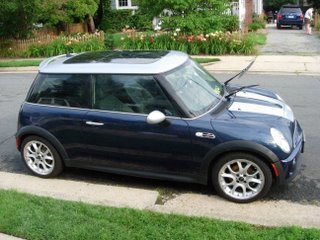
It's hard to tell in this photo, but there is a layer of the Zaino wax on the car. As you let it sit and cure, the wax will begin to haze.
 The result of buffing is a mirrored shine. Yummy.
There are several steps to follow in order to complete the Zaino process.
1. Wash the car with Dawn liquid dish detergent. The boys at Zaino recommend using Dawn due to it's high alkaline content. The akaline is responsible for stripping any wax, grease and residue from the finish of the car.
2. Claybar your ride. A claybar is able to remove contaminates from the surface of the paint -- i.e. tree sap, tar, water spots, bug guts and any other thing that may be on your paint. Zaino recommends pouring one capful of Zaino carwash detergent for every 24 ounces of water. I poured the ingredients into a spray bottle and shook it up for 30 seconds. After making the soapy concoction I began to spray dow a 2'x3' area and then rub the claybar back and forth over the area. Once I claybar'd the area, I sprayed the soap solution on it again, and then wiped the suds down with a dry cotton towel. No water spots appear ... at all!
You can claybar anything and everything on the car, just make sure to use plenty of lubricating soap solution. I claybar'd the windows to remove water stains. Works like a charm!
3. Wash your ride with Zaino carwash detergent. This removes all of the clay residue and the soapy solution that you had previously wiped off with the cotton towel.
4. Zaino your ride. I used the ZFX wax system made by Zaino. In order to make a fresh batch of the the ZFX soution add 10 drops of activator (blue stuff in the tiny vial) to a two ounce bottle supplied with the kit. Next, top off the bottle with the Z2 car polish. Put the cap on the bottle and shake it for two minutes.
Wipe the car down either all at once or section by section using a cotton towel or one of the cotton applicator pads Zaino includes in the kit.
Zaino recommends only using a dime-size of wax at a time, but I thought it was easier to use a quarter-size at a time. Make sure to wipe back and forth, not in a circular motion, Daniel-san.
5. Get your buff on. Wait 30-minutes, then wipe down the whole thing with a cotton towel and buff the hell out of it. Your car's paint will turn into a mirror.
You can keep waxing and buffing as much as you want. I only had time to do one coat of wax, but the results were amazing.

It's hard to tell in this photo, but there is a layer of the Zaino wax on the car. As you let it sit and cure, the wax will begin to haze.
 The result of buffing is a mirrored shine. Yummy.
Friday, July 07, 2006
New Mods: Window Tint & AVIC-N3 Hack
In the past two days I have added more mods to G8RMNI.
Window Tint
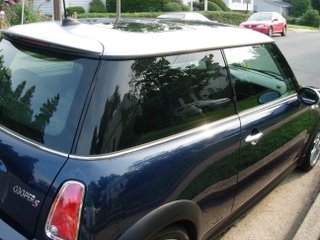
After work yesterday, I took G8RMNI to LA Tint in Sterling, VA to get the back side windows tinted. I went with the 38% Ultimate Series tint.
LA Tint exclusively installs Formula One tint. There were three different levels to choose from, all offering different benefits. I ended up going with the mid-priced option which utilizes a "metalized base for optimum reflectivity and heat rejection" ... whatever that means.
Bottom line: the car looks awesome. I'll post a photo soon.
Pioneer AVIC-N3 Headunit Hack
When I was at Circuit City a few weeks ago to buy a Sirius tuner, I had a short conversation with the car audio salesman. He told me about an easy hack which allows full operation of the menus of the AVIC-N3 headunit while the parking brake is not engaged.
Previously, I had to stop the car and pull the e-brake up if I wanted to enter a new address while in navigation mode. I also had to do this if I wanted to check my stocks and sports scores. I guess Pioneer received a bunch of complaints with previous units (AVIC-N2, N1), because now they make it really easy to get around this annoying safety feature -- if you are willing to void your warranty.
After I got home from Circuit City, I jumped online and Googled the hack. Here's a link to the forum I found which discusses the hack (amongst other cool stuff to do to the headunit).
Now, here's the hack:
1. Pull out the headunit from the dash and flip it over.
a. On an '06 MINI, there are two screws on each column that will need to be removed.
b. Pull the columns down and to the outsides of the car. You will be able to see the four screws which secure the headunit in the dash.
c. Unscrew the four screws, then pull the headunit out.
d. Flip the headunit over.
2. Remove the four tiny screws on the face plate of the headunit.
a. You will need to slide the sleeve to the rear of the headunit.
3. Remove the silver sticker that is on the bottom of the unit. Congratulations. You have voided your warranty.
4. Now that the sticker is removed, you will see a black switch. With a small (really small) bladed screwdriver, slide the little switch to the left.
5. Next, you'll need to ground the light green parking brake wire to a negative wire on the car. I found a run of the wire near my iPod adpator and spliced it into the black wire of the adaptor.
6. Put the headunit back into the dash and screw everything back together.
7. Reset the headunit (make sure the Nav DVD is loaded).
Congratulations, you can now watch a DVD while driving (don't crash). You can also take full control of all of the Nav menus while under way.
Window Tint
After work yesterday, I took G8RMNI to LA Tint in Sterling, VA to get the back side windows tinted. I went with the 38% Ultimate Series tint.
LA Tint exclusively installs Formula One tint. There were three different levels to choose from, all offering different benefits. I ended up going with the mid-priced option which utilizes a "metalized base for optimum reflectivity and heat rejection" ... whatever that means.
Bottom line: the car looks awesome. I'll post a photo soon.
Pioneer AVIC-N3 Headunit Hack
When I was at Circuit City a few weeks ago to buy a Sirius tuner, I had a short conversation with the car audio salesman. He told me about an easy hack which allows full operation of the menus of the AVIC-N3 headunit while the parking brake is not engaged.
Previously, I had to stop the car and pull the e-brake up if I wanted to enter a new address while in navigation mode. I also had to do this if I wanted to check my stocks and sports scores. I guess Pioneer received a bunch of complaints with previous units (AVIC-N2, N1), because now they make it really easy to get around this annoying safety feature -- if you are willing to void your warranty.
After I got home from Circuit City, I jumped online and Googled the hack. Here's a link to the forum I found which discusses the hack (amongst other cool stuff to do to the headunit).
Now, here's the hack:
1. Pull out the headunit from the dash and flip it over.
a. On an '06 MINI, there are two screws on each column that will need to be removed.
b. Pull the columns down and to the outsides of the car. You will be able to see the four screws which secure the headunit in the dash.
c. Unscrew the four screws, then pull the headunit out.
d. Flip the headunit over.
2. Remove the four tiny screws on the face plate of the headunit.
a. You will need to slide the sleeve to the rear of the headunit.
3. Remove the silver sticker that is on the bottom of the unit. Congratulations. You have voided your warranty.
4. Now that the sticker is removed, you will see a black switch. With a small (really small) bladed screwdriver, slide the little switch to the left.
5. Next, you'll need to ground the light green parking brake wire to a negative wire on the car. I found a run of the wire near my iPod adpator and spliced it into the black wire of the adaptor.
6. Put the headunit back into the dash and screw everything back together.
7. Reset the headunit (make sure the Nav DVD is loaded).
Congratulations, you can now watch a DVD while driving (don't crash). You can also take full control of all of the Nav menus while under way.
Wednesday, June 28, 2006
Window Tint and AIM Pages
I just booked an appointment with LA Tint in Sterling, VA. According to the posts I read on the NAM message boards they do a good job.
So, it looks like on the 6th G8RMNI will finally get his rear windows tinted. Sweet.
Did I mention G8RMNI now has his own AIM Page? MySpace sucks, AIM Pages are where it's at.
So, it looks like on the 6th G8RMNI will finally get his rear windows tinted. Sweet.
Did I mention G8RMNI now has his own AIM Page? MySpace sucks, AIM Pages are where it's at.
Tuesday, June 27, 2006
Maybe It's Time for G8RMNI to Get a Tan
Something else I've been wanting to add to G8RMNI are tinted windows. I had tinted windows in my last car and I think they really make a car stand out in a subtle way. (oxymoron?)
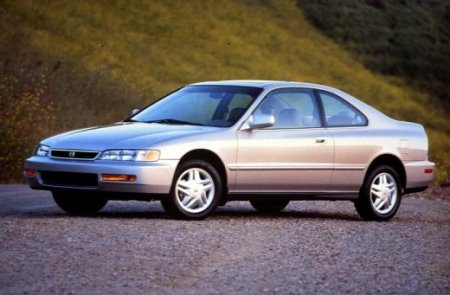
I learned some things about what windows to not get tinted on a car when I took my '94 Honda Accord in for tinting back in my college days at UF. A word to the wise: don't get the back windscreen tinted.
Since there are window defroster wires on the rear windscreen, the tinting folks recommend you not use the rear defroster; ever.
If that wasn't enough to annoy me as I drove in a blizzard during the middle of January when I moved back up to Virginia, the rear windscreen gets so dark at night, that it is hard to tell what is going on behind your car in the rearview mirror.
So, I guess I'll be getting just the back side windows tinted. I want something fairly dark that enhances the appearance of the car.
I Googled window tint shops near my office and it looks like there is a reputable one about a mile away from my cubicle. Hopefully they'll be able to take care of G8RMNI tomorrow or Thursday before I head out of town for the Fourth of July weekend.
Monday, June 26, 2006
Satellite Radio x2
Ever since I bought G8RMNI I’ve had to go without Sirius satellite radio. I know the stock stereo is Sirius-ready, but if you’ve read my past installation entries, you’ll note that I removed the stock system a day after I took delivery of the car.
 1994 Honda Accord
 1994 Honda Accord
I kept the Sirius One unit, but never had plans to install it in G8RMNI since I wanted everything fully integrated in my new car. As a result, I put the unit up for auction on eBay. You can bid on it here.
Since the AVIC-N3 has the ability to play a Sirius feed (with limited functions), it was just a matter of time before I bought a tuner and figured out how to integrate it into my system.

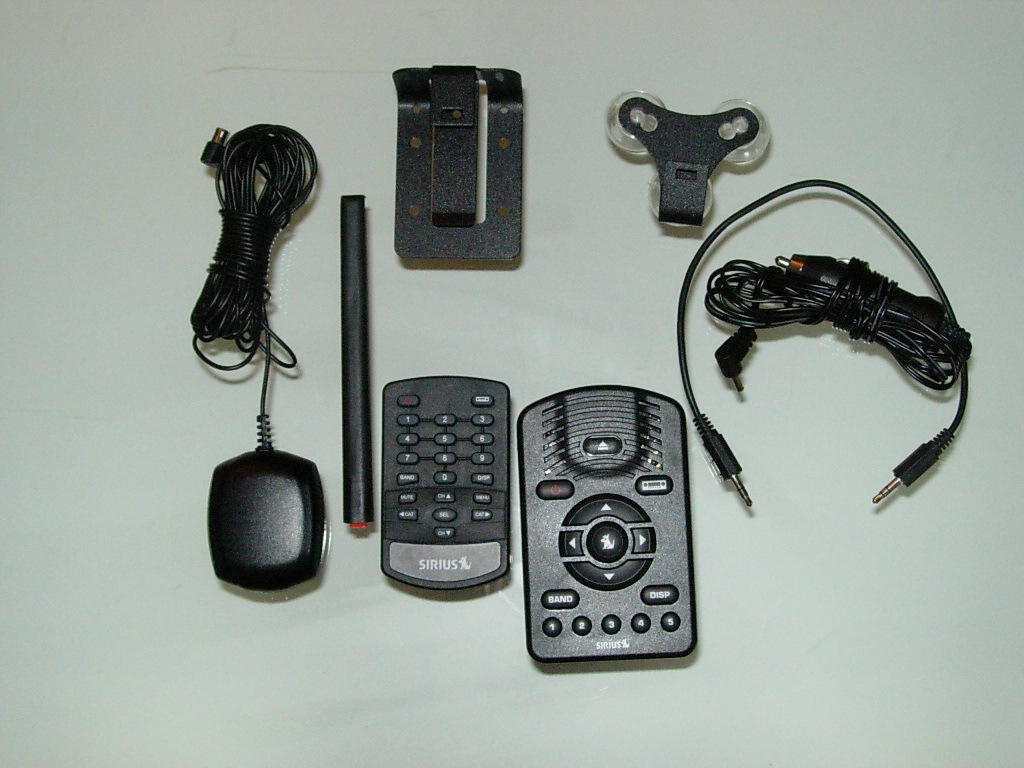
On Saturday I bought a direct connect unit(SIR-PNR2) from Best Buy and began to install it. The install should have taken fifteen minutes, but I blew a fuse and had to wait until the next morning to get some replacement fuses.
Long story short:
I hid the tuner behind the front passenger floor carpet, next to the XM tuner and iPod adaptor. The IP Bus from the Sirius tuner connects to an input on the iPod adaptor. I replaced the stock 2-amp fuse that came with the tuner with a 15-amp fuse (since I had blown this same fuse yesterday when I failed to make sure the car was ‘off’ before I cut some wires). I then spliced the power wires (yellow and black) from the tuner to the iPod adpator’s yellow and black wires. I also replaced the iPod adaptor’s fuse with a 15-amp fuse so that the load would be manageable.
I mounted the Sirius antenna on the dash with some Velcro next to the GPS and XM antennas.
It works great. Now I have Sirius and XM in my car and all of the wires are hidden away. Check out my video to see the two tuners in action.
Subscribe to:
Posts (Atom)

