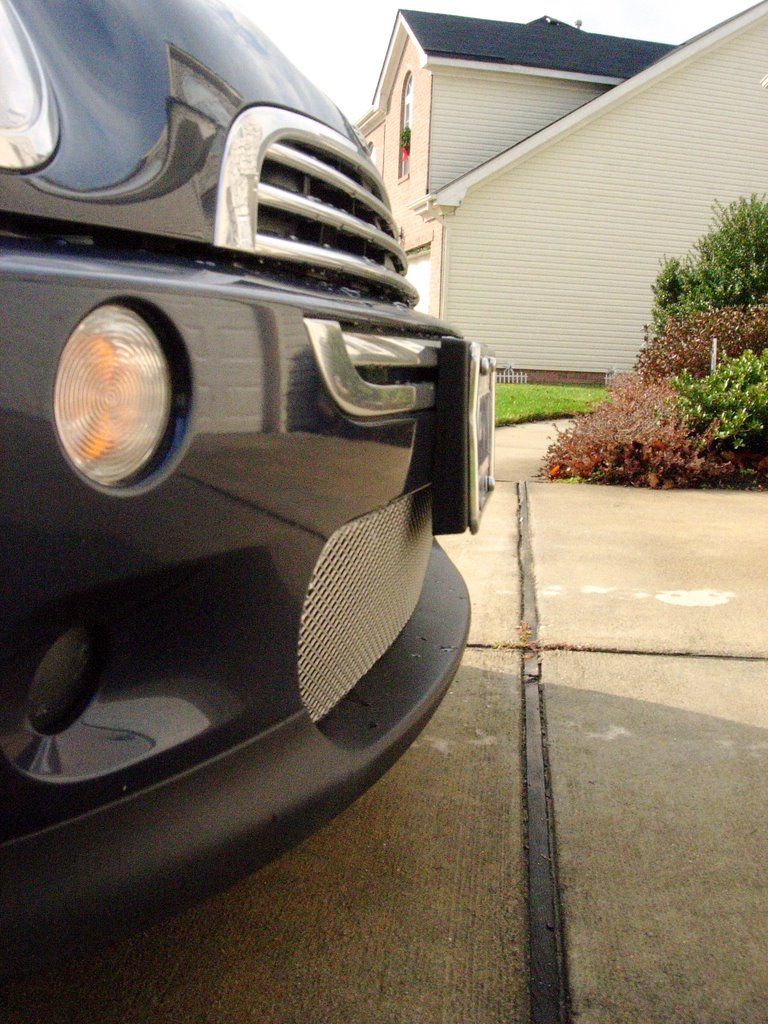
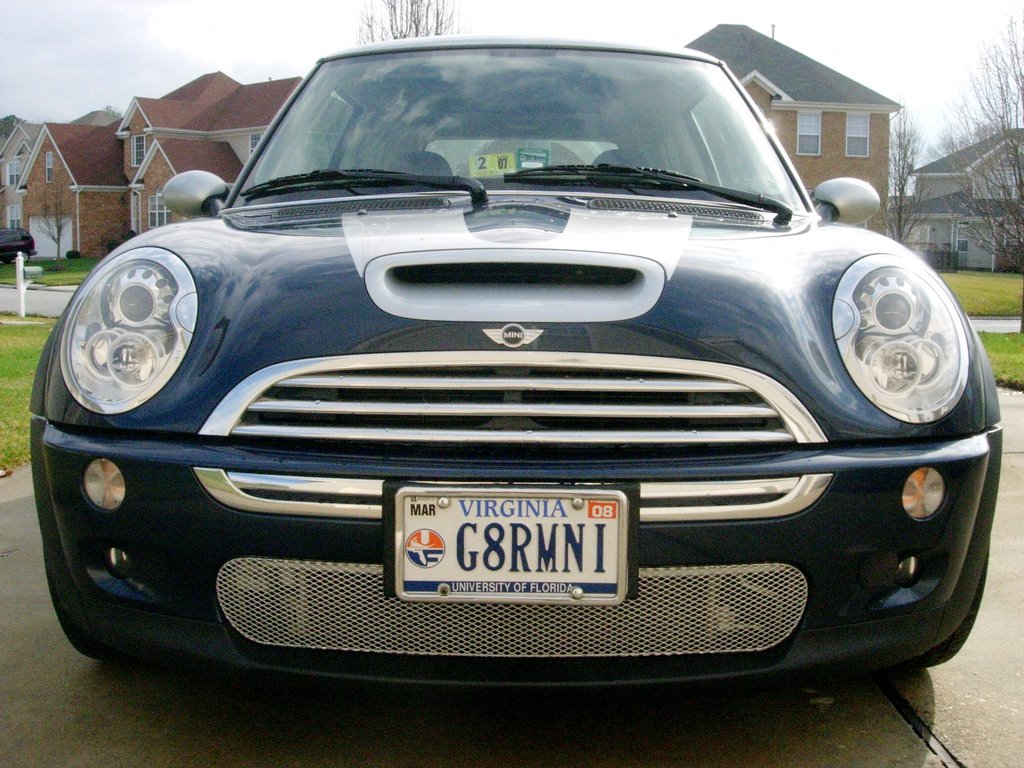
Saturday, December 23, 2006

New Mod: M7 Ultimate Grill

After several months without making a single entry, I finally have something new to blog about: I installed the M7 Ultimate Grill that had been sitting in my shed since August.

Here's the before:


Here's the after:

Originally purchased in August, the grill sat boxed up in my shed for several months since I was too busy playing soccer and sleeping on the weekends. I know -- poor excuses for not attending to my beloved MINI ...

The install process took me about two hours. I think for the more inclined grease monkey, it should only take around an hour, but since I am such a perfectionist (and newbie) I took my sweet time making sure the grill was installed right the first time.

The thing that took the longest was removing the front bumper skin. I searched the NAM message boards for a how-to on this mod, but came up with nothing. I ended up using an official MINI technical spec diagram to figure out what screws/bolts needed to be removed. I also looked at pictures of another MINI owner/blogger to see how the install process went for him.

Basically there are two #30 Torx bolts that get removed first. These are the easiest bolts to get to ... all the others require you get on your back and remove them from the underside of the bumper (5 in all).

After busting my knuckles and removing the two 8mm bolts that are below the headlamps in the wheel well area, I was ready to pull the bumper skin off ... wait a minute ... I forgot to disconnect the connectors for the headlamps, side indicators and fogs. Once all six of these connectors were unplugged, I was really ready to remove the bumper.

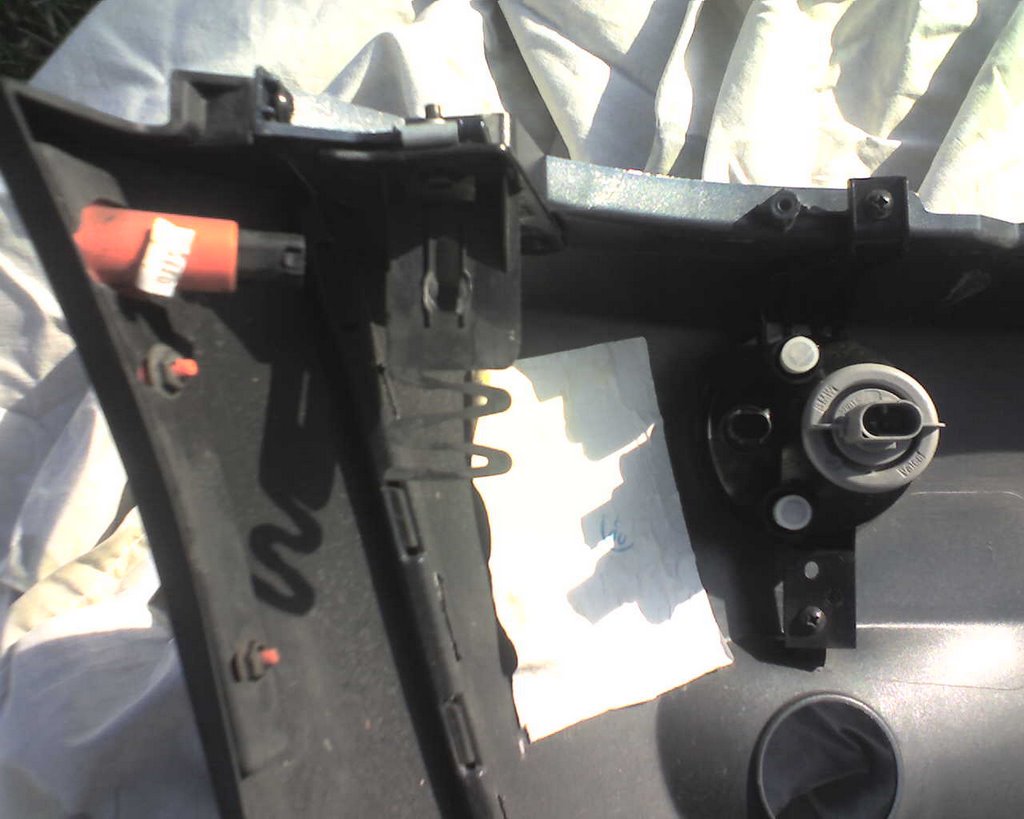
Above Photo: Inside of the bumper skin once it is removed. The orange connector goes to the side indicator light. The grey connector goes to the headlght.


I followed the included instructions with the grill to install it. They are very straight forward.

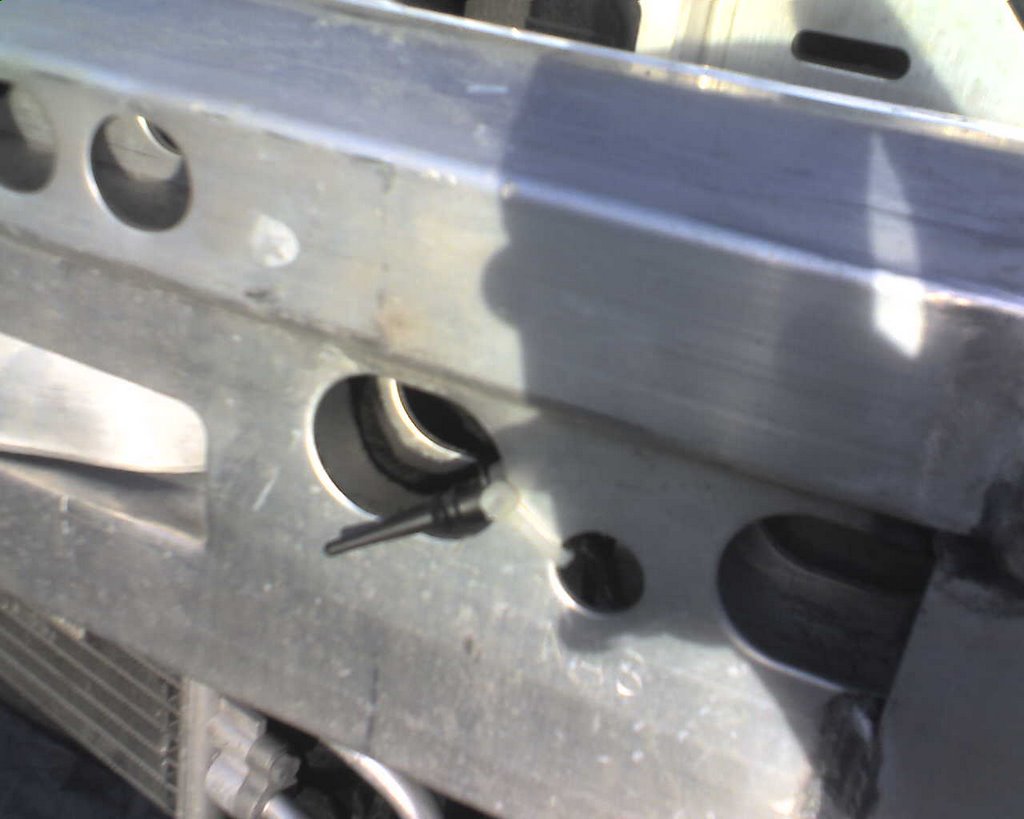
After I zip-tied the temperature sensor to the aluminum bumper strucure, I was ready to put the bumper skin back on. Putting it on was really easy.


Voila!

Saturday, September 02, 2006

Road Trip!

My oldest sis and I will be driving the MINI down to the Outer Banks tomorrow morning for a week-long vacation (much needed).

Since she is a soon-to-be MINI owner (Dark Silver MCS), I think I'll let her get used to the MINI by driving it most of the way down to the beach ... plus, that gets me out of having to drive :)

I finally received the M7 Ultimate grill in the mail this past week. Unfortunately, since hurricane Ernesto decided to come, I haven't had a chance to install it. I guess that will have to wait until after vacation is over.

Saturday, August 19, 2006

Photos of Latest Mods

Here are some photos of the chrome bits I installed last weekend ...

New Chrome Boot Handle

New Chrome Grill

New Chrome Toggle Ring Covers

Coming soon: M7 Ultimate Lower Grill

Friday, August 18, 2006

Chrome Bits Installation

I received several chrome pieces last week to install on the MINI.

It took me 40 minutes to install the OEM chrome grill since I was worried about cracking the chrome surround on the existing trim. After deciding to use a little force, I finally got the three slat grill on there. The fourth slat is still in it's original packaging as I decided to wait until I received the M7 Ulitmate lower grill before installing it. Both pieces require that I remove the bumper, so i decided to wait until I had the M7 part in hand before performing minor surgery.

The chrome toggle switch ring covers went on in about two minutes. They are just peel 'n stick pieces of plastic.

The chrome boot handle trim piece went on fairly easy as well. I made sure to wash the car before I installed this peel 'n stick piece.

I'll have pictures of everything in an upcoming post.

Friday, August 04, 2006

New Parts to Install

I bought some new bits to install on the car:

- MINI Chrome OEM Grill
- Chrome Boot Handle
- M7 Ultimate Grill

I'll post pictures and links to product ordering info when I get a chance later on. It's late and time for bed.

Tuesday, August 01, 2006

Off to Get the Dent Repaired ...

I took G8RMNI to the autobody shop to get repairs done. The shop seemed kinda seedy, so hopefully everything will turn out fine. USAA recommended them, so I trust USAA ...

I ended up renting a Mazda 6 while the repairs are being done. It sucks.

I feel like I am loafing down the road, the pick-up/pull is pathetic, the riding position is uncomfortable, the engine sounds tinny, and the upholstery is like sitting on industrial carpet.

I want my MINI back!

The Mazda 6 does have one cool feature though: The key fob is impressive-looking. The key itself feels cheap though; a laser-cut key would have upped the quality-feel factor.

By the way, the temp before I dropped off my car at the auto body shop read 100 degrees. Yowsa!

Sunday, July 30, 2006

Dent Status

I was contacted today by a claims rep at USAA to go over the damage on G8RMNI.

It looks like I'll be taking him to Craftsmen Auto Body in Sterling. My neighbor -- who owns a MINI as well -- recommends Craftsmen, as he has heard several good things about them from Porsche, Bimmer and Audi owners.

I hope they will be able to fit me in soon.