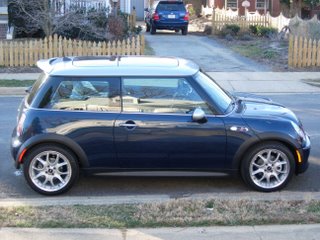
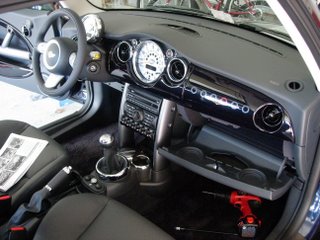
Here's my baby before I hit the road and travel three hours south to my parents house.
Filled with goodies, I hit the road...
 AfterI showed off my new wheels to my parents, I immediately began the install job.
 This is everything I am going to install.

Polk speakers, Infinity components, Pioneer AVIC-N2 , XM Tuner, iPod Adaptor, Parrot Bluetooth Phone Controller, Ian Cull's Auto-Up Circuit, and Mikey the MINI's MFSW Stereo and Bluetooth Adaptors. Oh, and an Alta shorty antenna.
Man, that's a ton of stuff!
The first step is to remove the negative connection on the battery. The battery is underneath the false floor in the boot. You'll need a 10 mm socket to remove it.

Now the screw party begins: There are four screws you will have to remove in order to start the head unit removal process. Open up the glove compartment in order to access both of the screws on the right column. The two screws on the left column come out with having to do anything to the dash on the left side of the car.
After you have removed the four column Torx screws, (I think I used a size 30 Torx bit on my cordless drill) pull down on the columns and move them towards the outside of the car.
Next, remove the four Torx screws that hold the factory radio in place. I think I used a size 15 Torx on these.
Get your fingers around the factory stereo and pull it out, making sure to unplug the wiring harness and antenna lead. Now the real adventourous part begins:
Using a small flat head screw driver, carefully price up the trim around the power mirror console. Next, remove the screw underneath the mirror panel.
Remove the two screws in the cupholders.
You should now be able to slide the entire center floor console towards the rear of the car. This makes it a lot easier to work with the web of wires you'll be stuffing into the dash ... believe me.
Next you'll need to remove the passenger side seat in order to mount the Pioneer GPS hideaway unit.
The Torx screws that hold the rails on the seat down are huge. I used a size 40 Torx to remove them (although I think a size 42 or 43 would have been more appropriate).
While you are at it, remove the big Torx bolts that attached the driver and passenger side seatbelts.
Before you lift out the passenger seat, make sure to grab a flashlight and unplug the four wires underneath it. I think two of them are for the airbag and the other two are for the heated seat convenience ... If you didn't get heated seats, there may only be two wires (don't quote me on this, I am totally guessing here).
*NOTE: Don't try to start the car without the wires connected to the passenger seat. If you do, you will trip the airbag faulty sensor and have to pay your dealer to reset the airbag system for you.
Once the passenger seat is out, remove the rubber trim from the door sill. You have to do this in order to be able to remove the sill kick panels.
Using a panel remover tool, gently pry the sill kick panel off. In order to install the reverse wire you have to do this...


No comments:
Post a Comment