After you've made sure all of your wiring harnesses are spliced/plugged in, (I used a MFSW adaptor from Mikey the MINI, along with a Parrot Bluetooth MFSW adaptor from him) connect them to the AVIC-N2 headunit.
If you went the same route as me, you will have what seems like just TOO many wires. Have no fear; there is a solution for this.
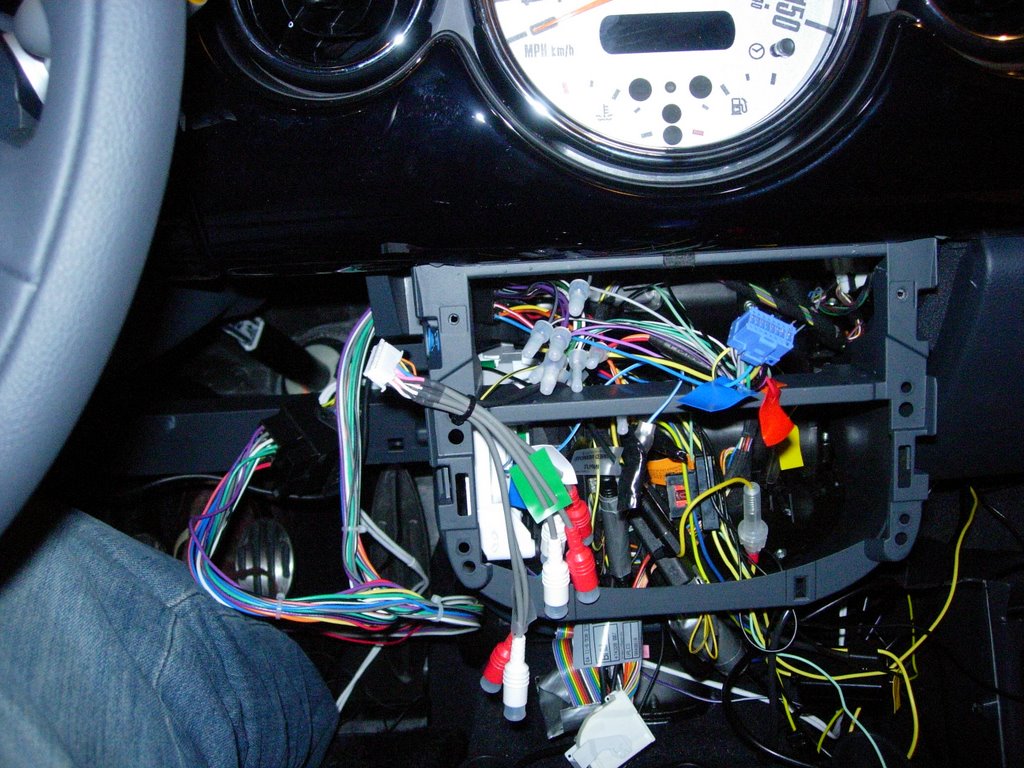
You'll want to remove the knee bolster that is beneath the steering wheel in order to find a place to stick all of those wires and adaptors.
To remove the bolster, grip the panel and give a sharp tug straight down. It may require a significant amount of force, so don't worry about really laying into it.
Now that you have the bolster out of the way, reach around to the back of the stereo through the opening you created by removing the knee bolster. Pull the wires and harnesses through.
The headunit should now have enough room to slide into it's DIN chassis.
Once you have the stereo with it's adaptor plate in place, go ahead and screw it in using the same Torkx screws you removed over two hours ago :).
I used electrician's tape to secure all of the wires and adaptors beneath the steering column. you can attach them to the plastic bar that runs horizontally below the steering column. See the photo below to see what bar I am referring to.

Next up, installing Ian Cull's Auto-Up Window Adaptor ...


No comments:
Post a Comment